Kotlinでandroidアプリを始める
Kotlinでandroidアプリのサンプルのようなものを作りたいと思います。
この記事ではKotlinでandroidアプリを作るための設定とサンプルの作成を行います。
それなりに形になっているものはいつか作ろうと思います。
Kotlinとは
KotlinはJavaよりも安全で簡単な言語と謳われています。
KotlinはJavaと同じく中間コードにコンパイルされ、jvmがそれを実行します。
このjvm上で動く言語というのが他にもいろいろあるようですが、流行ってるんですかね。
KotlinはJavaと同じような機能をもち、Javaのライブラリーを利用することができます。
習得難易度はそこまで高くないため、最低限のプログラミングの経験があれば割と簡単に使えるようになると思います。
Android Studioでkotlinを使えるように設定
まずはandroid studioをインストールします。
ちなみにこの記事でつかうandroid studioのバージョンは3.3です。
インストールが完了したらプロジェクトを作成します。
ひとまずActivityは「EmptyActivity」を選択しましょう。
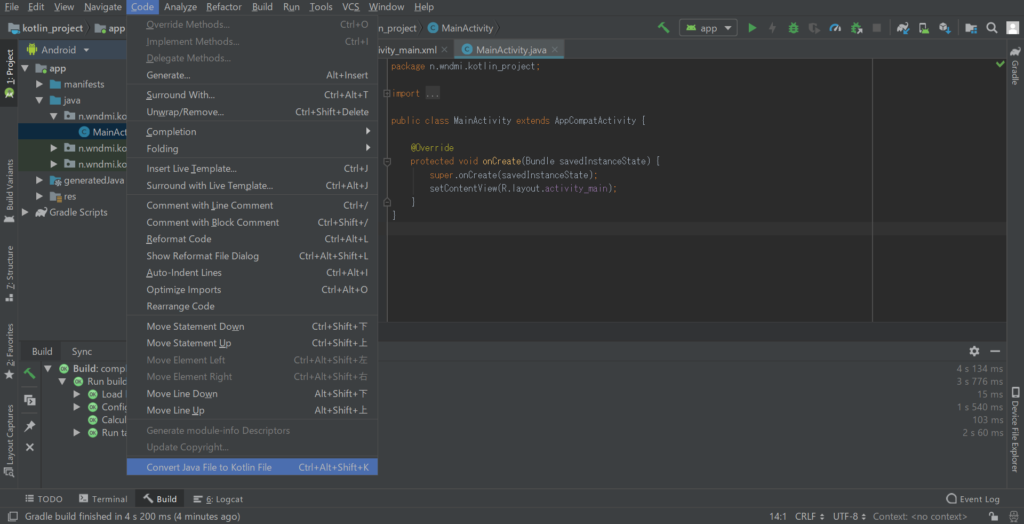
プロジェクトを作ったらまずはKotlinをJavaに変換します。
メニューのCodeにあるConvert Java File to Kotlin Fileを実行します。
これでJavaで書かれたソースがKotlinに変換されます。
※プロジェクトを作成する時点で、開発に使う言語をKotlinに設定した場合この作業は必要ありません。
そうするとソースコード上部にConfigureと表示されると思います。
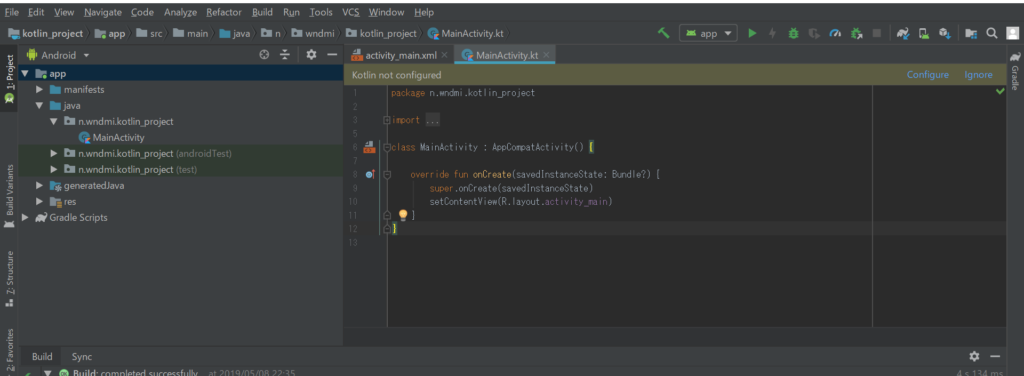
このConfigureをクリックするとKotlinの設定が始まります。
Kotlinを使えるようにするためにgradleファイルが修正されます。
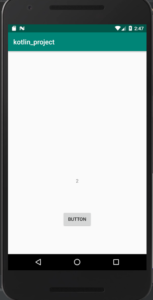
そしたらアプリを実行してみましょう。
初期の状態なので画面にHello World!が表示されます。
簡単なサンプルを作ろう
ボタンを押すと数字がカウントされていく普通のサンプルを作ってみます。
import android.support.v7.app.AppCompatActivity
import android.os.Bundle
import android.view.View
import android.widget.Button
import android.widget.TextView
import kotlinx.android.synthetic.main.activity_main.*

class MainActivity : AppCompatActivity() , View.OnClickListener{

    // タップ数を格納しておくための変数
    var count: Int = 0
    // TextViewのインスタンスを格納する変数
    var countText: TextView? = null


    override fun onCreate(savedInstanceState: Bundle?) {
        super.onCreate(savedInstanceState)
        setContentView(R.layout.activity_main)

        // idからTextViewのオブジェクトを取得
        countText = this.findViewById(R.id.count)
        countText!!.text = count.toString()

        // idからButtonのオブジェクトを取得
        val btn: Button = this.findViewById(R.id.btn)
        // ボタンがタップを検知するように
        btn.setOnClickListener{
            count += 1
            countText!!.text = count.toString()
        }
    }

}
ソースコードです。
Javaと同じくonCreateがエントリーポイントです。
30行くらいの小さいプログラムですので簡単に把握できると思います。
Kotlinはボタンの設定部分をもっと簡単にできたような気がします。
こちらがActivity側のファイルです。
<?xml version="1.0" encoding="utf-8"?>
<android.support.constraint.ConstraintLayout xmlns:android="http://schemas.android.com/apk/res/android"
    xmlns:app="http://schemas.android.com/apk/res-auto"
    xmlns:tools="http://schemas.android.com/tools"
    android:layout_width="match_parent"
    android:layout_height="match_parent"
    tools:context=".MainActivity">

    <TextView
        android:id="@+id/count"
        android:layout_width="wrap_content"
        android:layout_height="wrap_content"
        android:layout_marginTop="376dp"
        android:text="Hello World!"
        app:layout_constraintLeft_toLeftOf="parent"
        app:layout_constraintRight_toRightOf="parent"
        app:layout_constraintTop_toTopOf="parent" />

    <Button
        android:id="@+id/btn"
        android:layout_width="wrap_content"
        android:layout_height="wrap_content"
        android:layout_marginStart="8dp"
        android:layout_marginLeft="8dp"
        android:layout_marginTop="8dp"
        android:layout_marginEnd="8dp"
        android:layout_marginRight="8dp"
        android:layout_marginBottom="8dp"
        android:text="Button"
        app:layout_constraintBottom_toBottomOf="parent"
        app:layout_constraintEnd_toEndOf="parent"
        app:layout_constraintStart_toStartOf="parent"
        app:layout_constraintTop_toBottomOf="@+id/count" />

</android.support.constraint.ConstraintLayout>
感想
感想はありません。
Javaよりも記述量が少なく済むために初心者には優しい言語かと思います。
あまりプログラミング経験がない状態でandroidアプリを作りたいと思った場合、
Kotlinを使うとつまずきにくいのかなと思いました。